

The Coalition has gone all-out in Gears of War: E-Day when it comes to hiding various objects across the shooter’s five acts. With 130 collectibles to gather — the most of any Gears instalment to date — there’s a lot to keep an eye out for.
As you close in on each of the Gears of War: E-Day collectibles, the ever-familiar Crimson Omen chime will ring out. However, that’s not to say your work’s done. Some of the objects are sneakily stashed away, which could leave you hunting for a hot minute. As lovers of all things shiny (and in this case, bloody), we’ve already done all the legwork so you can spend less time snooping, and more time shooting. We’ll keep the spoilers to the absolute minimum, but do be mindful that certain items are tied to key story beats.
Act 1
There are 13 collectibles to find in Act 1.

Chapter 1 — Emergence
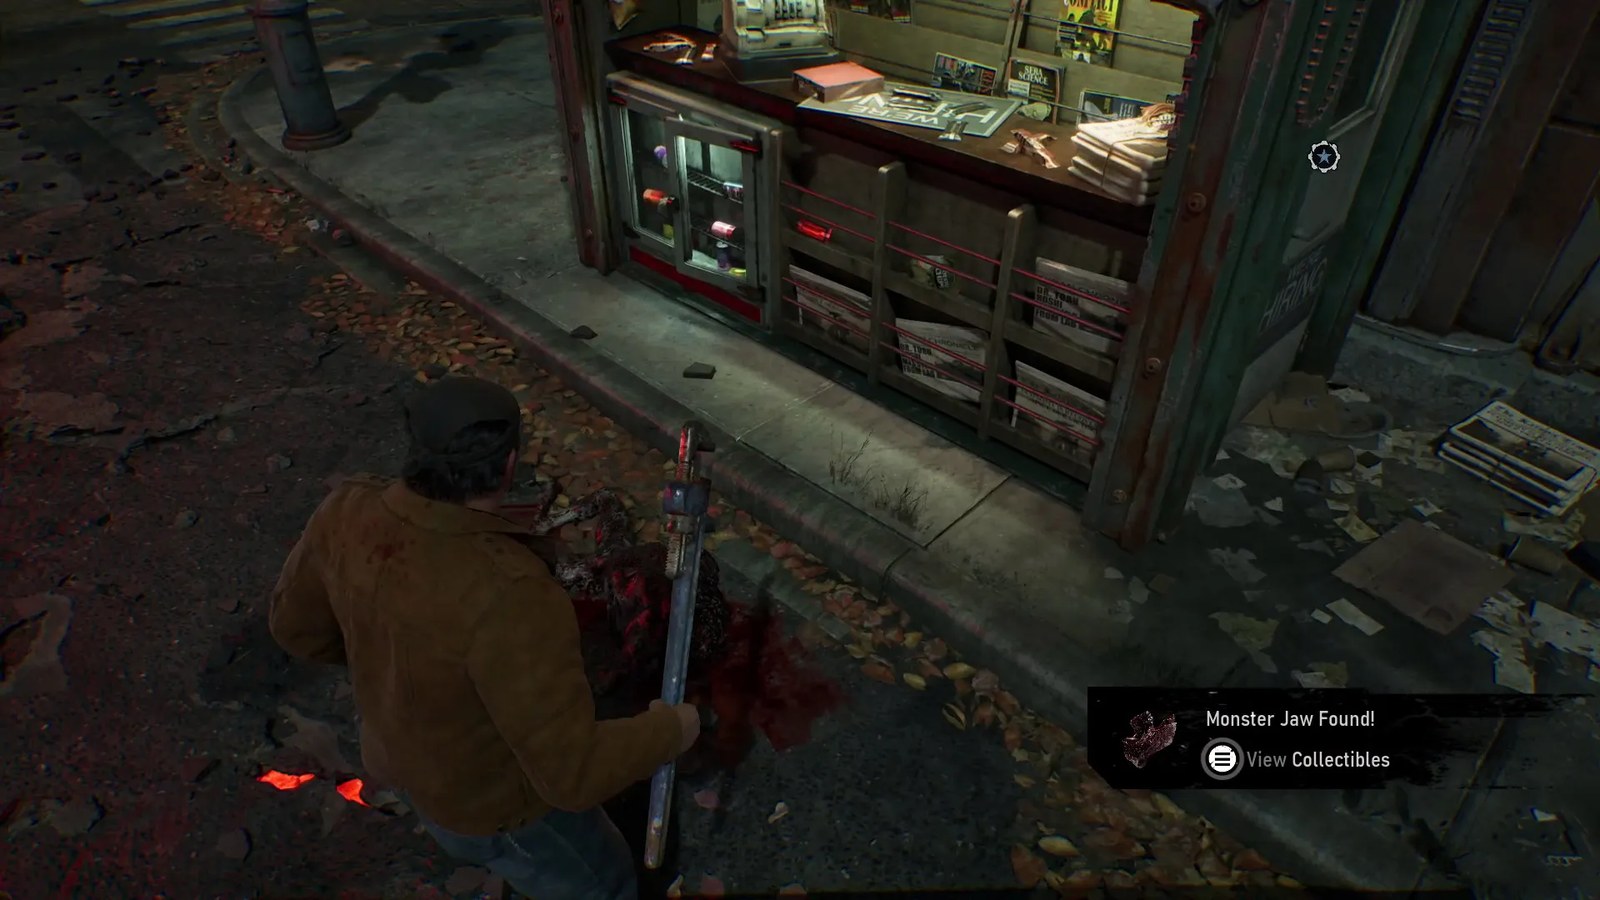
Monster Jaw
As soon as you’ve finished battering the first batch of Wretches E-Day throws at you, a cutscene will play. Once it finishes, you’ll immediately find the Monster Jaw between an open Emergence Hole and a newsstand.
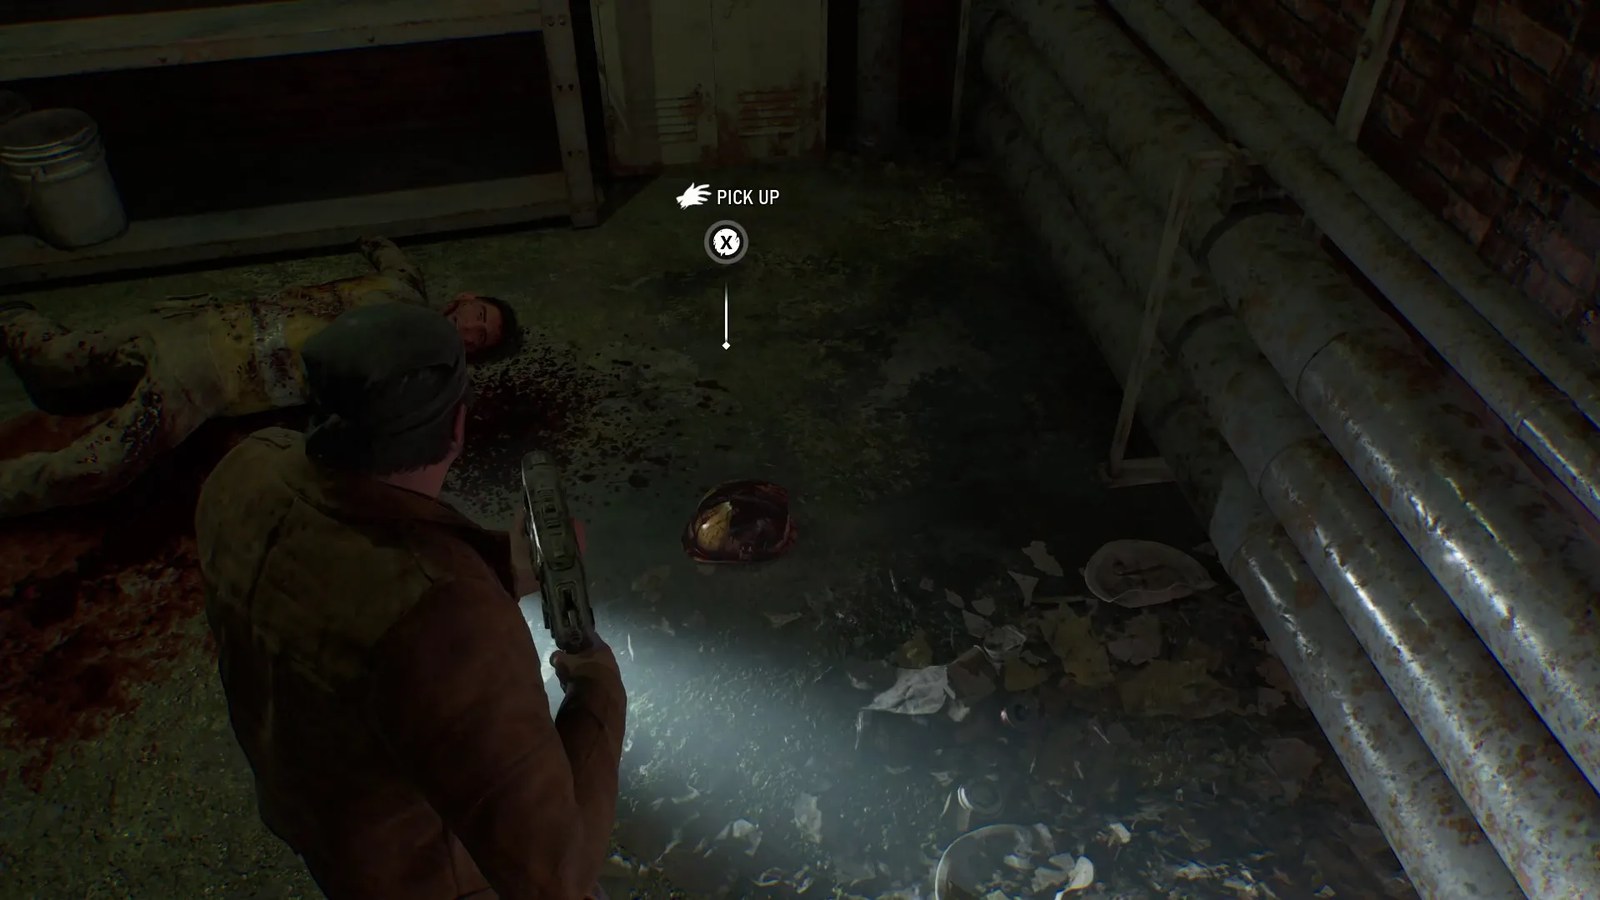
Bloody Transit Worker’s Helmet
While heading through the lower level of the maintenance tunnels, you’ll come across an adjoining area on the left hand side. Here, you’ll find a torch, a corpse, and most importantly, the Bloody Transit Worker’s Helmet.
Front Page of the Kalona Times
The Front Page of the Kalona Times can be found in the kitchen inside the ‘Cafe & Bakery.’ You’ll reach the bloodied up eatery immediately after Marcus displays his burly might through lifting a concrete pillar off a pinned down civvie, and you make swift work of some more Wretches.
Chapter 2 — Survival of the Fittest
KPD Police Bulletin
Pretty much as soon as Chapter 2 starts, you’ll find yourself in the police station’s main office area. Stick to the left-hand side and make your way towards the back of the room. You can grab the KPD Police Bulletin off of one of the desks.
Bloodied Police Chief’s Badge
Once you’ve made it to the Tactical Operations area, open up the double doors leading into the conference room. You’ll be greeted by the impaled corpse of the police chief, whose badge rests on the shelftop below him. Sorry, chief, but we’ll be taking that.
Army Recruitment Pamphlet
E-Day is the perfect time to be a COG recruiter, and the Army Recruitment Pamphlet can be yours as soon as you’ve battled your way to the Recruiting Center. Head to the back of the main foyer, and you’ll see it behind the reception desk.
Try On Pilot Helmet
If one collectible in the Recruiting Center wasn’t enough to satiate your magpie needs, how about a second? Directly to the right of where you picked up the pamphlet, a row of helmets sit proudly on display. We’re sure the COG won’t mind if a Try On Pilot Helmet goes missing from its collection.
Chapter 3 — A Gear in Need
Tomatoes, Canned
Getting into the fortified Pay-N-Save requires some slightly scenic routing — how about the stock area? As you make your way through it, stick to your left and you’ll come across some canned tomatoes. That’s not blood on the floor next to that body, it’s tomato juice… Hopefully.
Broken Lancer Bayonet
During the cutscene in the Pay-N-Save, Marcus gets into a slight spot of bother. As it turns out, bayonets are pretty useless when it comes to dispatching drones. After the scrap, you can retrieve the Broken Lancer Bayonet from his assailant as a souvenir.
Chapter 4 — Back in the Fold
Frontpage of the Tyran Chronicle
As soon as the chapter starts, you’ll begin escorting Mayor Shaw. As you make your way down the street, dip to the right of the ‘Bar & Lounge.’ You’ll find the Frontpage of the Tyran Chronicle on the steps next to the sad-looking mattress.
Anti-UIR Propaganda Poster
Once you’ve cleared out the back alleys, you’ll find yourself outside of Landa Medical. Dom will crack open the chainlink gates, but before you zoom across the street, head to the bottom of the stairs and hook a right, following the sidewalk until you come across the Anti-UIR Propaganda Poster.
Landa Medical Supplies Memo
Now inside Landa Medical, Shin’s services will be called upon. Head into the reception area, where you’ll find the Landa Medical Supplies Memo on the main desk.
COG Tags of Private Brick Rosso
After fragging out some E-Holes, you’ll be able to get out of the Landa Medical parking lot. Around the other side of the police car across the street, you’ll find the chopped-up body of Private Brick Rosso, as well as the poor fella’s COG Tags.
Act 2
There are 38 collectibles to find in Act 2.
Chapter 1 — Bravo Squad
COG Helmet With Bullet Hole
Right at the start of the chapter, head behind the burnt-out bus at the end of the street. You’ll come across a headless COG soldier, as well as their helmet. We’re no Sherlock Holmes, but the rather large bullet hole in it may indicate how they met their end.
Sniper Goggles
The Sniper Goggles can be found at the far end of the first control room you enter. Their distinct orange glow is hard to miss. They’re just sitting there, menacingly.
Bridge Worker’s Lunch Kit
With Charlie Squad safely seen across the bridge to the second control room, it’s now time to rendezvous with the gang. Upon descending the ladder, taking you below the bridge, hook a left and follow the section around to gobble up the Bridge Worker’s Lunch Kit.
Thrashball Rush Magazine
While the Cole Train may not have left the station just yet, we can see the defensive lineman in his prime on the cover of the Thrashball Rush Magazine. Similarly to the Sniper Goggles, the collectible can be yours by heading to the end of the second control room.
Medic’s First Aid Kit
The end of Chapter 1 reintroduces an OG enemy in explosive fashion. Once the first couple of them have been dispatched, you’ll find your path across the bridge blocked off by a wall of fire. Follow the quest objective down the winding staircase, then sharply shift to the left. Let Bravo squad cover you while you collect the Medic’s First Aid Kit, found on the floor between a station wagon and a burning COG truck.
Chapter 2 — Hold the Line
Hold the Line is a multi-part mission with a whopping 27 collectibles to snap up. Three collectibles can be yours in part one, all of which are in the vicinity of the subquests you’ll run into. 18 are available in part two, while the final six are in part three.
The transition between each part is a point of no return, so make sure you get everything before moving on. While some collectibles can be gathered from this open section earlier than they feature on the list, the narrative does have you double-back, so everything can be retrieved based on the in-game order below.
Cinema Filmatica Magazine
Once you’ve picked up the map, Captain Grey will let you out into the open area. As soon as you’re free to roam, head across to the used car dealership. Not only will you be able to take on The Vanguard side mission for a couple of Gears of War E-Day weapon mods, but if you head into the back room, you’ll also find the Cinema Filmatica Magazine.
A Letter Home
As you head by the Last Dollar store, you’ll hear a family cry out for help, kicking off the Trapped Family sidequest. First, you’ll need to kill off some Wretches, before heading into the store’s garage. As you head into the hallway, look to your right. A Letter Home will be on the wall of a small room.
Thrashies Cereal Box
Only two acts in and we’re already onto our next bit of Cole Train paraphernalia. As you reach the Timgad Prime store, you’ll spot some squaddies in need. Give them a helping hand (or chainsaw), then head into the store itself. The Thrashies Cereal Box is sitting pretty on the counter.
You may have triggered a collectible marker while making your way through the trainyard. Don’t worry, you haven’t missed anything by forging ahead. Once you’ve geared up and headed out from Octus Way Station, throw a hard right along the path, through the gates, and into the back alley area. The Kalona Postcard is on the floor behind the stone benches.
Vandalized Salvaging Poster
Fending off a global invasion is hungry work, so why not head into the Major Burger for some delicious processed calories? While you’re at it, head into the restroom and procure the Vandalized Salvaging Poster.
COG Tags of Private Liz Waxman</























Join the conversation